Tor Relay Setup Guide
The bandwidth and stability of Tor, the onion routing network, come from relays run by volunteers around the world, and every new relay lets more people use the internet safely and anonymously. A middle relay only forwards traffic inside the Tor network and never connects to a final destination, so its operator carries far less legal risk than an exit operator (the roles of each relay type are covered in What is Tor?). The steps on this page use a middle relay as the example.
Pre-installation assessment
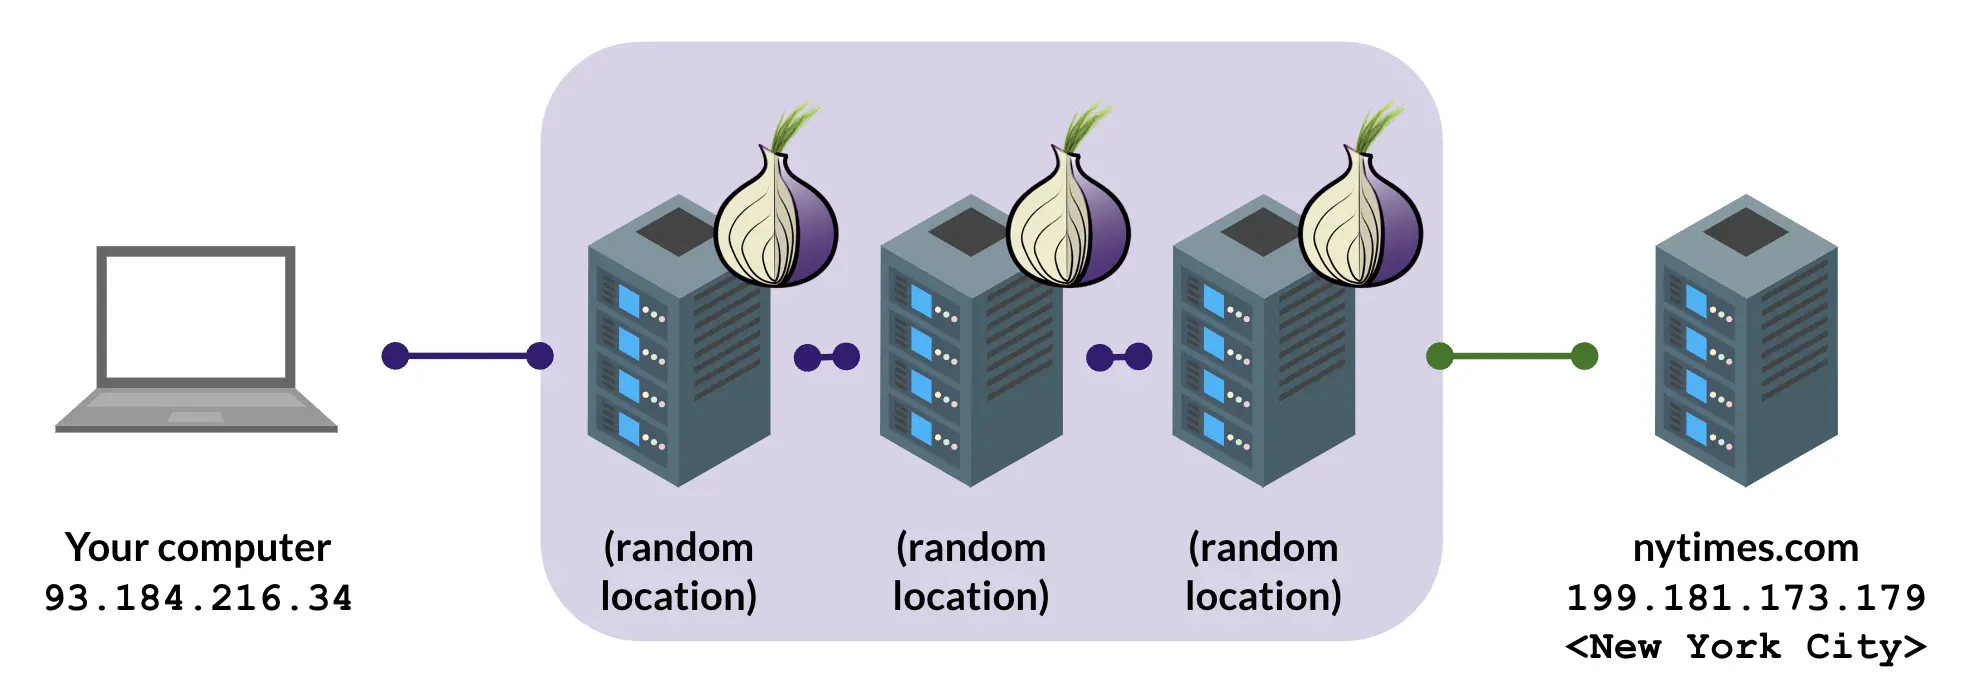
Decide the following before you start. If you plan to run an exit relay, also weigh how much risk you can accept:
- Relay type: an exit relay, or a non-exit relay such as a bridge or middle relay.
- Exit policy: for an exit relay, which ports to allow. More open ports usually means more abuse or legal complaints.
ORPort: the external TCP port that accepts Tor connections. If no other service on the server is using 443, we recommendORPort 443. Public Wi-Fi networks often leave only a few ports open, and 443 is usually one of them. Port 9001 is another commonORPort.ContactInfo: the relay's contact email address, which is published.- Bandwidth and traffic: how much bandwidth and monthly traffic you are willing to give Tor.
- IPv6: whether the server has an IPv6 address.
Middle relay setup
We recommend Debian or Ubuntu, and the examples below use them. For other operating systems and more detailed installation instructions, see the official Tor Project | Middle/Guard relay documentation.
Package installation
apt update
apt install tor
Latest and testing releases
The tor package in a Linux distribution is not always the latest release. For the latest or testing version, follow the official instructions to switch to the Tor Project's package repository: Why and how can I enable the Tor Package Repository in Debian?
torrc configuration
Edit the configuration file /etc/tor/torrc:
Nickname    myNiceRelay # Adjust "myNiceRelay" to the name you want to display publicly.
ContactInfo your@e-mail # Contact information, will be displayed publicly.
                        # If you don't want it to be public, you can set it to none.
ORPort      9001        # The default port is 9001.
                        # Port 443 is often one of the few ports left open on
                        # restrictive networks, so using it can help users there
                        # reach your relay. Remember to open the matching port on
                        # your firewall and router.
ExitRelay   0           # Do not become an exit relay.
SocksPort   0
Log notice file /var/log/tor/notices.log # Enable logging
Restart tor. The default instance is tor@default.
systemctl restart tor@defaultThen check /var/log/tor/notices.log or the system log /var/log/syslog. The text Self-testing indicates your ORPort together with reachable means the ORPort can be reached from outside. After about three hours, the relay should appear on Relay Search.
Post-installation practices
For what to look after once the relay is running, see the official Tor Project | Relay Post-install and good practices.
nyx monitoring
nyx is a terminal monitor for Tor that shows the relay's status and performance live. After installing it, run nyx to open it.
apt install nyx
nyx
Multiple instances on one host
The tor package on Debian and Ubuntu ships the tor-instance-create script, which creates several independent Tor instances on the same server so that each relay keeps its own configuration and logs.
Instance creation
tor-instance-create takes the instance name, which may only contain letters and digits. The matching systemd unit is tor@<instance-name>.
tor-instance-create {instance-name}
tor-instance-create mytor2
The example creates an instance named mytor2, with its configuration file at /etc/tor/instances/mytor2/torrc and its data directory at /var/lib/tor-instances/mytor2.
Instance configuration
Set the instance's parameters in /etc/tor/instances/mytor2/torrc, for example:
ORPort 9002  # Set a new ORPort, ensuring each instance uses a different port.
DataDirectory /var/lib/tor-instances/mytor2/data
Log notice file /var/lib/tor-instances/mytor2/notice.log
Instance startup
Start or restart the new instance:
# systemctl start tor@{instance-name}
systemctl start tor@mytor2
nyx for a single instance
Point nyx at the instance's control socket with -s:
nyx -s /run/tor-instances/{instance-name}/controlCommon questions
Legal risk
Guard and middle relays only forward traffic inside the Tor network and never connect to a final destination, so the chance of law enforcement contacting the operator is low. Exit relays carry more legal risk and need careful consideration first.
We are a community based in Taiwan, where running a Tor relay is currently legal. The legal situation can change, so it is worth following internet freedom issues and legislation where you are. Outside Taiwan, the EFF's Legal FAQ for Tor Relay Operators is the place to start.
Home networks
Running a relay over a home connection, such as fibre or cable broadband, may mean reconfiguring the router your ISP provides, which takes some technical work. Home routers block all inbound connections by default, so you need to allow inbound traffic to your ORPort in the firewall and forward that port on the router.
Bandwidth and network requirements
The Tor Project recommends at least 10 Mbit/s (about 1.25 MB/s) in each direction for a relay, see Relay requirements. With more than 1 Mbit/s but less than 10 Mbit/s, it suggests running an obfs4 bridge instead. A relay also needs a static IP address, an ISP that permits this kind of traffic, and a firewall and router that can be configured for the required port forwarding.
A relay only uses up to the bandwidth limit you configure, so it will not take all your capacity. You may still notice slightly slower speeds under heavy load, and you can adjust the bandwidth limits in the configuration as needed.
Operator privacy
The relay itself does not access or track users' traffic. Be careful with identifying details in the published fields, and do not put an email address that identifies you personally in ContactInfo.
Software updates
Keep the Tor software updated to get security fixes and new features. On most Linux systems, update it through the package manager. On Windows and macOS, check the Tor website for new releases regularly.
Guard selection
Guard status is assigned automatically and cannot be configured by the operator. A relay that runs stably with enough bandwidth may be chosen as a guard.
Related reading
- Tor WebTunnel Bridge Setup Guide: bridge traffic disguised as ordinary HTTPS, for censored networks a plain relay cannot reach
- Tor Relay Watch: relay counts, bandwidth and roles in Taiwan and nearby regions
- Tor Relays on Campus Track: the plan and cases for running relays on university networks
- Contributing to the Tor Project: ways to take part in Tor upstream, and its official channels